Are you ready to sew all your 8 star points together? This part is so easy!
 |
The back of your point have all the seams ironed in one direction toward the head.
Notice all the little triangles pointing up in this picture?
Some people clip them off, I never do. |
 |
| The two points on the left are right side up, the one on the right is the back of the point. |
 |
Place two finished points right side together, line them up as best you can.
The Pinners will have a great time here, the rest of you may decide to take up pinning, but I don't use them.
You will be sewing from the toe, the center of the point. |
 |
Where it is most important to match diamonds is where the 4 come together.
You inner most point should match but it may not be exact. |
 |
| The 4 diamonds on the right sides look like this, remember you ironed all of your seams in one direction. |
 |
The needle was in the down position, begin sewing slowly.
Always go slow, there is no hurry. |
 |
When you get to the first intersection fold the top piece back.
It will lay flat against the bottom seam and you will have a perfect fit.
Notice the wrinkle in the top seam, this will happen. |
 |
Continue up the row folding the top seam away from you.
I fold this back before I get there, if it is not flat you will feel a lump or a space. |
 |
| The last one. |
 |
Stop 1/4" from the edge and back stitch.
REMEMBER to always back stitch here! |
 |
| Iron the seams away from you, you still want all of your seams ironed in the same direction, it makes sewing the two halves a piece of cake! |
 |
You will have 4 pieces like this, remember all the seams are ironed away from you.
You are always sewing from the toe to the head and leaving a 1/4" open at the V, which is on the left in this picture. |
 |
| Close up of 1/4" left open, the back stitch is important. |
 |
Sometimes when you lay your two points together they are not a perfect match.
This is not the end of the world, really it isn't.
Line them up so where your seams come together match. |
 |
| This is where you want to make them work! I have folded the top point seam to lay flat next to the bottom point seam. |
 |
| Notice the bottom point now is poking out about a 1/8" to a 1/4" of an inch, this is what it should do, you want the seams to lay flat where my finer is. |
 |
The little bit of extra you took up here is what will keep your centers laying flat.
When you iron this it will be perfect. |
 |
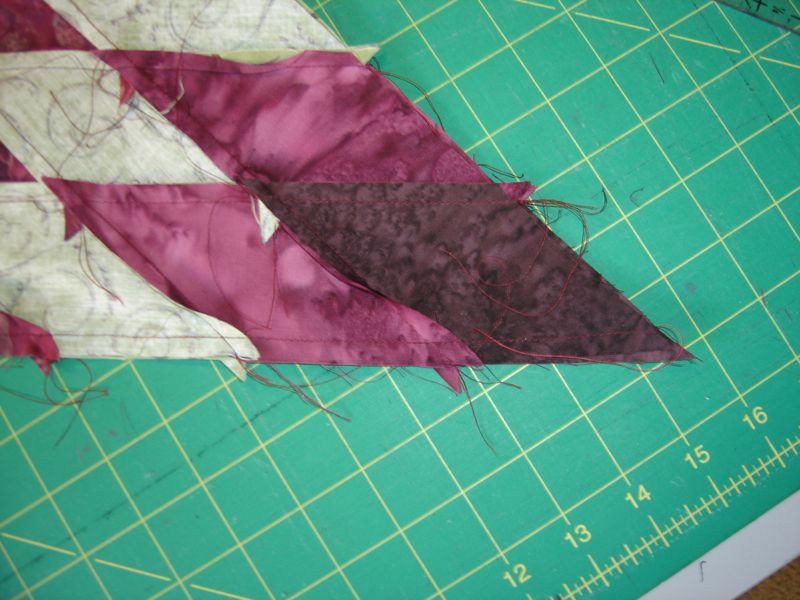
Two points sewn, wrong side view.
All of the little triangles are still pointing in the same direction,
Except the seam where the two pieces are sewn together. |
 |
Now you will be sewing the quarter sections into half sections.
RIght sides together, flip up the top so you can see for yourself how the two pieces will fit perfectly next to each other.
This time the top seam will be towards you. |
 |
When they are down this will feel perfectly smooth.
If there is a lump or a space you will feel it. |
 |
The messed up one is on top, how convenient for us.
Sew the rest exactly the same as you sewed the two points together. |
 |
Iron all seams away from you.
We are almost finished with the center. |
 |
Now for sewing the 2 halves.
Line up the pieces right side together. |
 |
| Trim the where the bulk of the 4 pieces overlap. |
 |
| Nicely trimmed. |
 |
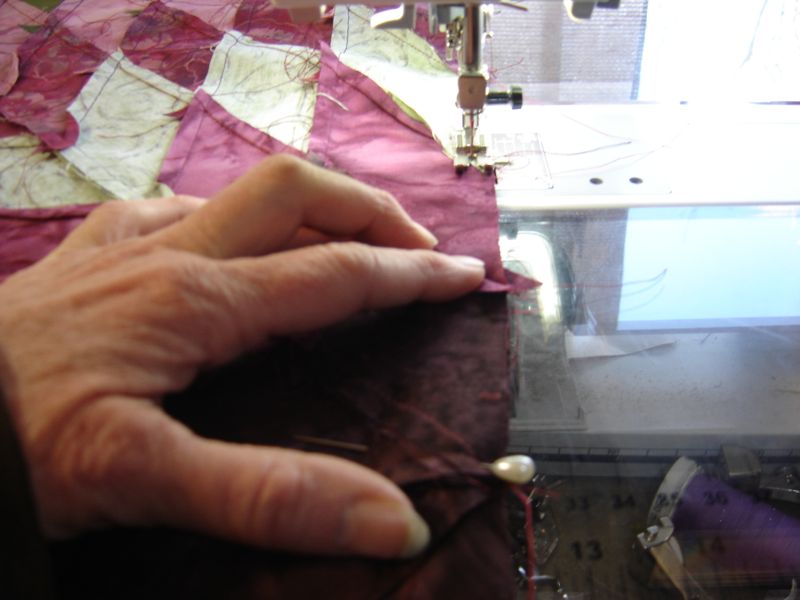
The very center will look like this.
I want you to pin this part, it is one of the few places I use pins.
You can see where the 4 pieces come together. Place a pin on the wrong side of the top pice first.
The reason for pinning here is when you are sewing if you place the needle in the exact pin hole your center will be perfect. |
 |
| Pin |
 |
Two sides pinned.
I bet you pinners lover this. |
 |
Pinned.
Lots of pictures for reference. |
 |
| Now you are going to go to the edge and sew, remembering to leave a 1/4" with a back stitch from the edge. |
 |
The top seam will fold towards you.
It will still lay flat if it is perfectly matched.
Sew this part slowly. Once you get the needle in the intersection, fold the next one. |
 |
| One small step at a time. |
 |
| A view of the how it looks if you step back, I rarely do. |
 |
| Getting closer to the middle always folding the seams to lay flat. |
 |
| One diamond at a time, aren;t you amazed at how well they match up. |
 |
| You can see the pin now. |
 |
| As you get closer to the pin slow down and turn the handle, you want the needle to be exactly in the pin hole before you remove the pin. This may take a couple of tries. |
 |
| The needle is in the pin hole here before I remove the pin and keep sewing. |
 |
Now continue sewing to the edge.
The top seam will now be facing the center. |
 |
| Fold seam toward the center, it is still laying flat. |
 |
| Top seams to the center. |
 |
| Top seams to the center |
 |
| Tope seams to the center, still laying flat. |
 |
| The edge where you will remember to leave 1/4" from the edge and back stitch. |
 |
| The end of point piecing! |
 |
| Now you get to iron all seams to one side. |
 |
Iron
I always iron away from me and I do use steam. |
 |
| Center |
 |
Center is finished.
|
Now you get to see how your star center looks next to the fabric you choose for the background. I use to choose the fabric before I did the center, now I like to see which fabric pops the center in away I find appealing. Lay you center next to some colors which you will ordinarily not even consider. It is fun and the results can be remarkable.
 |
Now to choose a background color.
Sometimes I actually take the star to the local quilt store and look at it next to a variety of fabric.
You might want to try it if you have a store near you, the color you end up choosing could be way different from your 1st choice. |
 |
| It looks good next to the blue, but I am not using blue. |
 |
I love the green dots but that particular color looks quite nasty with this quilt.
I am using the light green above it. |
 |
Measure two sides of a point or two.
If you did a 7 diamonds across this will be roughly 21" |
 |
This one with 1/4" seam allowance for the other edge is a little over 20"
I will cut 22" squares.
I use 22" so I do not have to figure out all the complicated math for the difference in the triangles and the squares.
This also gives me a nice edge once all the pieces are background pieces are sewn in. |
The background squares will take about 66" of fabric. For this quit I am using all the same color for the squares and triangles, but you can use one color for 8 triangles and another to square off the quilt. Iron the fabric before cutting. Your iron is your friend!
 |
| Of course you trim the edge so you have a nice straight one. |
 |
| Ah the fabric will be 22" once the selvedge is cut off. |
 |
I start with cutting the selvedge, then tear it.
I know it is awful, but my edge is straight. |
 |
| All of the selvedge nows goes into a little bag I keep on my cutting table |
 |
Little bag of selvedge I save until it is full for my friends on the
quilting board, it gets used in creative projects. |
 |
| Now measure down 22" and make a notch in the fabric, so you know where your cut line will be. |
 |
| Little cut. |
 |
| Measure down 22" on the other edge and make a small cut as well. |
 |
| See the nice little cut? |
 |
Now you can cut straight across and you will have 2 22" squares
You need t cut 6 22" squares.2 of them will be cut into triangles. |
 |
| Done |
 |
| Fold 2 of your 22" squares into triangles. |
 |
| Press making sure the edges are all matching. |
 |
| Now with them back on your cutting board cut off a very slight edge, just enough to make the squares into triangles. |
 |
| Done |
 |
| You can see the tiny strip I took off |
Ready to sew?
Each step is easy, just remember to go slow, take your time, breath.
I always, always and forever sew the triangles in first.
It is not the end of the world if you do not, but it sure makes the quilt look nice.
For the few who may still be doing hand quilting, setting the background squares in like this, gets rid of a bunch of extra seams you don't have to quilt through.
 |
| A pin to mark the 1/4" in from the edge on the triangle. |
 |
| I fold it over to be sure it is going to fit. |
 |
The pin is now in the triangle and the point intersection.
Remember where you left the 1/4" opening, this is where your background piece will not fit perfectly. |
 |
| A not so great picture of the right sides together. |
 |
Pinned, flattened and ready to sew.
I have smoothed the top fabric along the point and will pick it up just like this to sew.
Yes, I know the Pinners are going to be filling this edge with pins, and please do if it makes you comfortable. |
 |
| Start with the outside edge, the background is going to be longer, so of course you sew starting at the point. |
 |
| Lined up and ready to sew to the pin. |
 |
| Sewing happily away! |
 |
| Ah ha there is the pin in our merry jaunt to finishing out star. |
 |
Slow down as you get close to the pin, when you are 3 or 4 stitches away, stop sewing with the foot. Use the hand turner to move your needle into the pin hole.
Exactly into the pin hole is where you want the needle. |
 |
The needle is in the pin hole!
You can now remove the pin.
LEAVE THE NEEDLE DOWN! |
 |
Turn the star away from you, so the point you are about to sew will have the tip pointing towards you.
Don't worry about or even touch the background piece at this juncture, just the star.
THE NEEDLE IS STILL DOWN |
 |
Just like this.
Once it is facing you then the next step.
NEEDLE IS DOWN |
 |
Now turn the background fabric.
This is really much easier then it looks, once you have done a couple you will be a pro.
NEEDLE IS DOWN |
 |
Almost there
NEEDLE IS ALWYAS DOWN |
 |
| Now smooth out the edges and back to sewing, as soon as you check the corner! |
 |
Once you have this turned the fabric at the corner will be flat and smooth, no lumpies.
You will be able to feel this. |
 |
| Lower your pressure foot and resume sewing. |
 |
| Sewing happily away again. |
 |
| The background will be longer then the point! |
 |
| Iron the seams toward the background piece. |
 |
| Perfect. |
 |
One triangle in your star.
Now add the other 3 into every other space. |
 |
Background triangles all added.
Much easier then you thought! |
 |
Ready to add the corner squares!
You are going to do the same thing you did with the triangles, pin at the intersection. |
 |
| The little triangle at the top will poke out for you to trim later. Just sew a straight line to the pin. |
 |
| Sewing happily along! |
 |
| Slow down as you get close to the pin. Remember to stop and turn the handle the last couple of cranks. |
 |
Needle in the pin hole, mission accomplished.
You can remove the pin.
Do you remember how to turn the fabric?
Turn the star first until the point is facing you, then turn the background fabric, it works like a dream. |
 |
| Smooth out the fabric under the needle and continue sewing with joy! |
 |
| One background square in and you can finish the other 3, cause you are a pro now. |
 |
Trim the little triangles at the edge.
They are too bulky to leave |
 |
| Iron the seams to the outside edge of the quilt, away from the center. |
 |
Trim the excess.
This is one of the few places I create waste in a star quilt. I have cut the squares to exact size of the sides of a diamond, inevitably it seems as if though my measurement is off, so now I always add that extra inch and I have no problem.
You will find that you will have varying amounts of excess on each side, but no worries cause you have a large enough square. |
 |
| I use the line I just sewed to help square off the edge and trim. |
 |
| A different view of trimming. |
 |
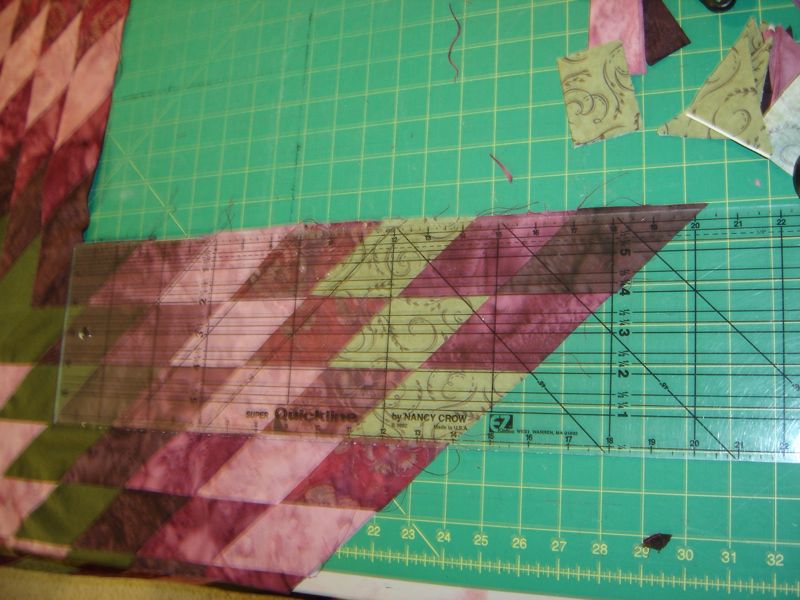
Now for the top edge, line up the ruler with the edge you just cut and the point seam to the left in this picture.
Sometimes words to describe a process just escape me. |
 |
| Right edge close up of the picture above. |
 |
One square trimmed!
Only 3 more! |
 |
This is the total waste from the star quilt.
Remember all the end triangles and rectangles were put into piles for future scrappy quilts and the selvedge we keep for someone else. |
 |
Congratulations
The center is done.
For those of you wishing to email me pics of your finished quilts,
I can do a student page.
mtquilts@mt.net |
 |
I want to make this quilt larger then queen. I recently did 4 star quilts so they hang over the edges of a queen sized bed to the dust ruffle.
I want my finished size to be roughly 96 by 112
The star center is 70" square.
One this quilt I am doing one border strip on each side. The star is large and will be in the center of the bed. |
I always add the narrowest border strip first, in this case it will be the 13" wide strip. I make the strip about an inch longer then I think I need just in case, and I have needed it more then once. In case you haven't noticed I am not into exact measurements once I am past the diamonds.
 |
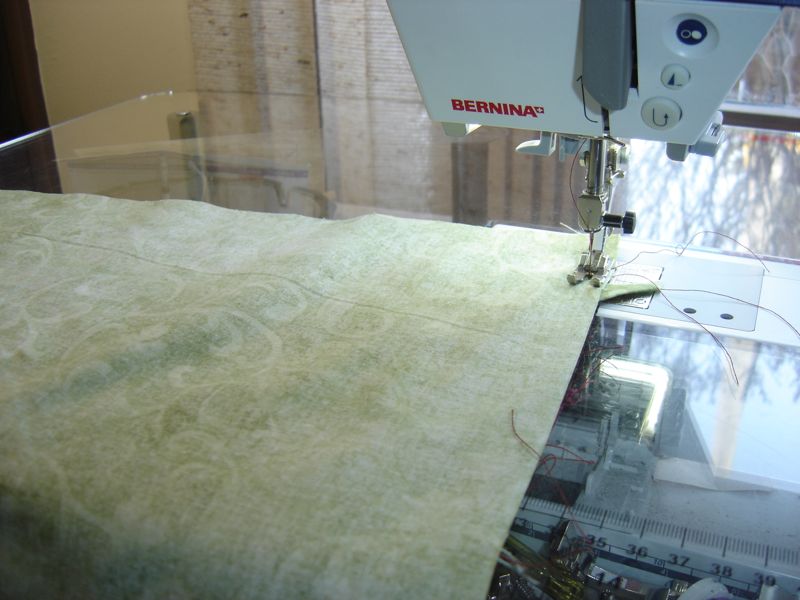
| First border strip added and of course you are ironing the seams away from the center. |
 |
Oh my a bit of excess to trim of.
It only takes seconds. |
 |
All done and ready to quilt.
For those of you with limited space, you can see mine is as well. |
 |
| Nicely folded waiting to go on the quilting machine, and yes I will add those pictures as well. |
Happy Star Quilt making!
 |
| On the machine ready for the quilting to commence. |
 |
I decided to do simple swirls, partly because if the background fabric and partly because the color in the quilt reminds me of spring and a garden trellis.
The good close up is so not the actual color. |
 |
| Now I hope all of you are quilting away as well! |
Now that all of you are finished with your quilts, those of you wanting to share please send a pic and we can all see them on the page I just created for you all. I am so excited to see them, I can barely stand it.
Here is mine quilted and bound. I will add it on our finished stars page.
 |
Many of you are probably like me and do not have a whole bunch of space so don't worry about it.
We all just want to see the finished quilts. |
http://parkersnowefiberartblog.blogspot.com/2012/01/star-quilts-finished-by-blog-students.html

Star Quilt Tutorial Part 2


5 comments:
Wow, this is an amazing tutorial! Very detailed and thorough. Thanks for taking the time to put it all together and post it for us.
You are welcome Sue!
Thanks a lot for sharing this. I hope to have some time this summer to face this challenge!
Nany, it is really easy you will enjoy it!
Ditto!!! On Sue’s comment
Post a Comment